Cinematic Lighting for Beginner Filmmakers
Cinematic lighting comes down to four steps: find your light direction, backlight your subject, add a key light, and shape your shadows.
For many filmmakers, myself included, getting a cinematic look used to feel impossible without a huge budget. But after years of trial and error, learning from industry legends, and developing my own toolkit, I've found that cinematic lighting is more about understanding light than owning expensive gear.
Below, I'll walk you through the exact four-step process I use on every shoot, plus a bonus technique that adds instant production value.
Table of Contents
- Step 1: Direction of Light
- Step 2: Backlighting
- Step 3: Add a Key Light
- Step 4: Create Shadows
- Bonus: Reflections
- Budget Lighting Gear That Works
- FAQ
Cinematic Lighting for Beginners: A 4-Step Process
Today, I'm going to share this process with you in four steps. At the end, I'll share a bonus tip that can add even more depth and interest to your shots.
Step 1: Find Your Direction of Light (Motivated Lighting)
The secret to creating natural, effortless-looking cinematic lighting is to work with the environment's existing light sources. This is called motivated lighting.
Identify the main sources of light in your scene (windows, lamps, doorways) and choose one to be your main motivating light source. Turn off any unflattering ceiling lights. Overhead fluorescents flatten everything and kill contrast, which is the opposite of cinematic.
On my documentary One Breath, we often relied on a single window as our motivating source. That one decision shaped the entire mood of each interior scene.
Once you've chosen your motivating source, you're ready for the next step.

Step 2: Backlight Your Subject
Now, place your subject between your camera and your chosen light source. This technique is called backlighting (or upstage lighting).
Backlighting creates contrast, enhances shadows, and produces interesting pockets of light on your subject. It gives your shot depth and a more cinematic feel. Without it, your image looks flat.
This is the single biggest difference between amateur and professional-looking footage. Most beginners put the light behind the camera, which removes all shadows and depth. Flip it around, and the shot transforms.

Step 3: Add a Key Light
To further illuminate your subject, introduce a key light. The key light is your primary light source on the subject's face or body.
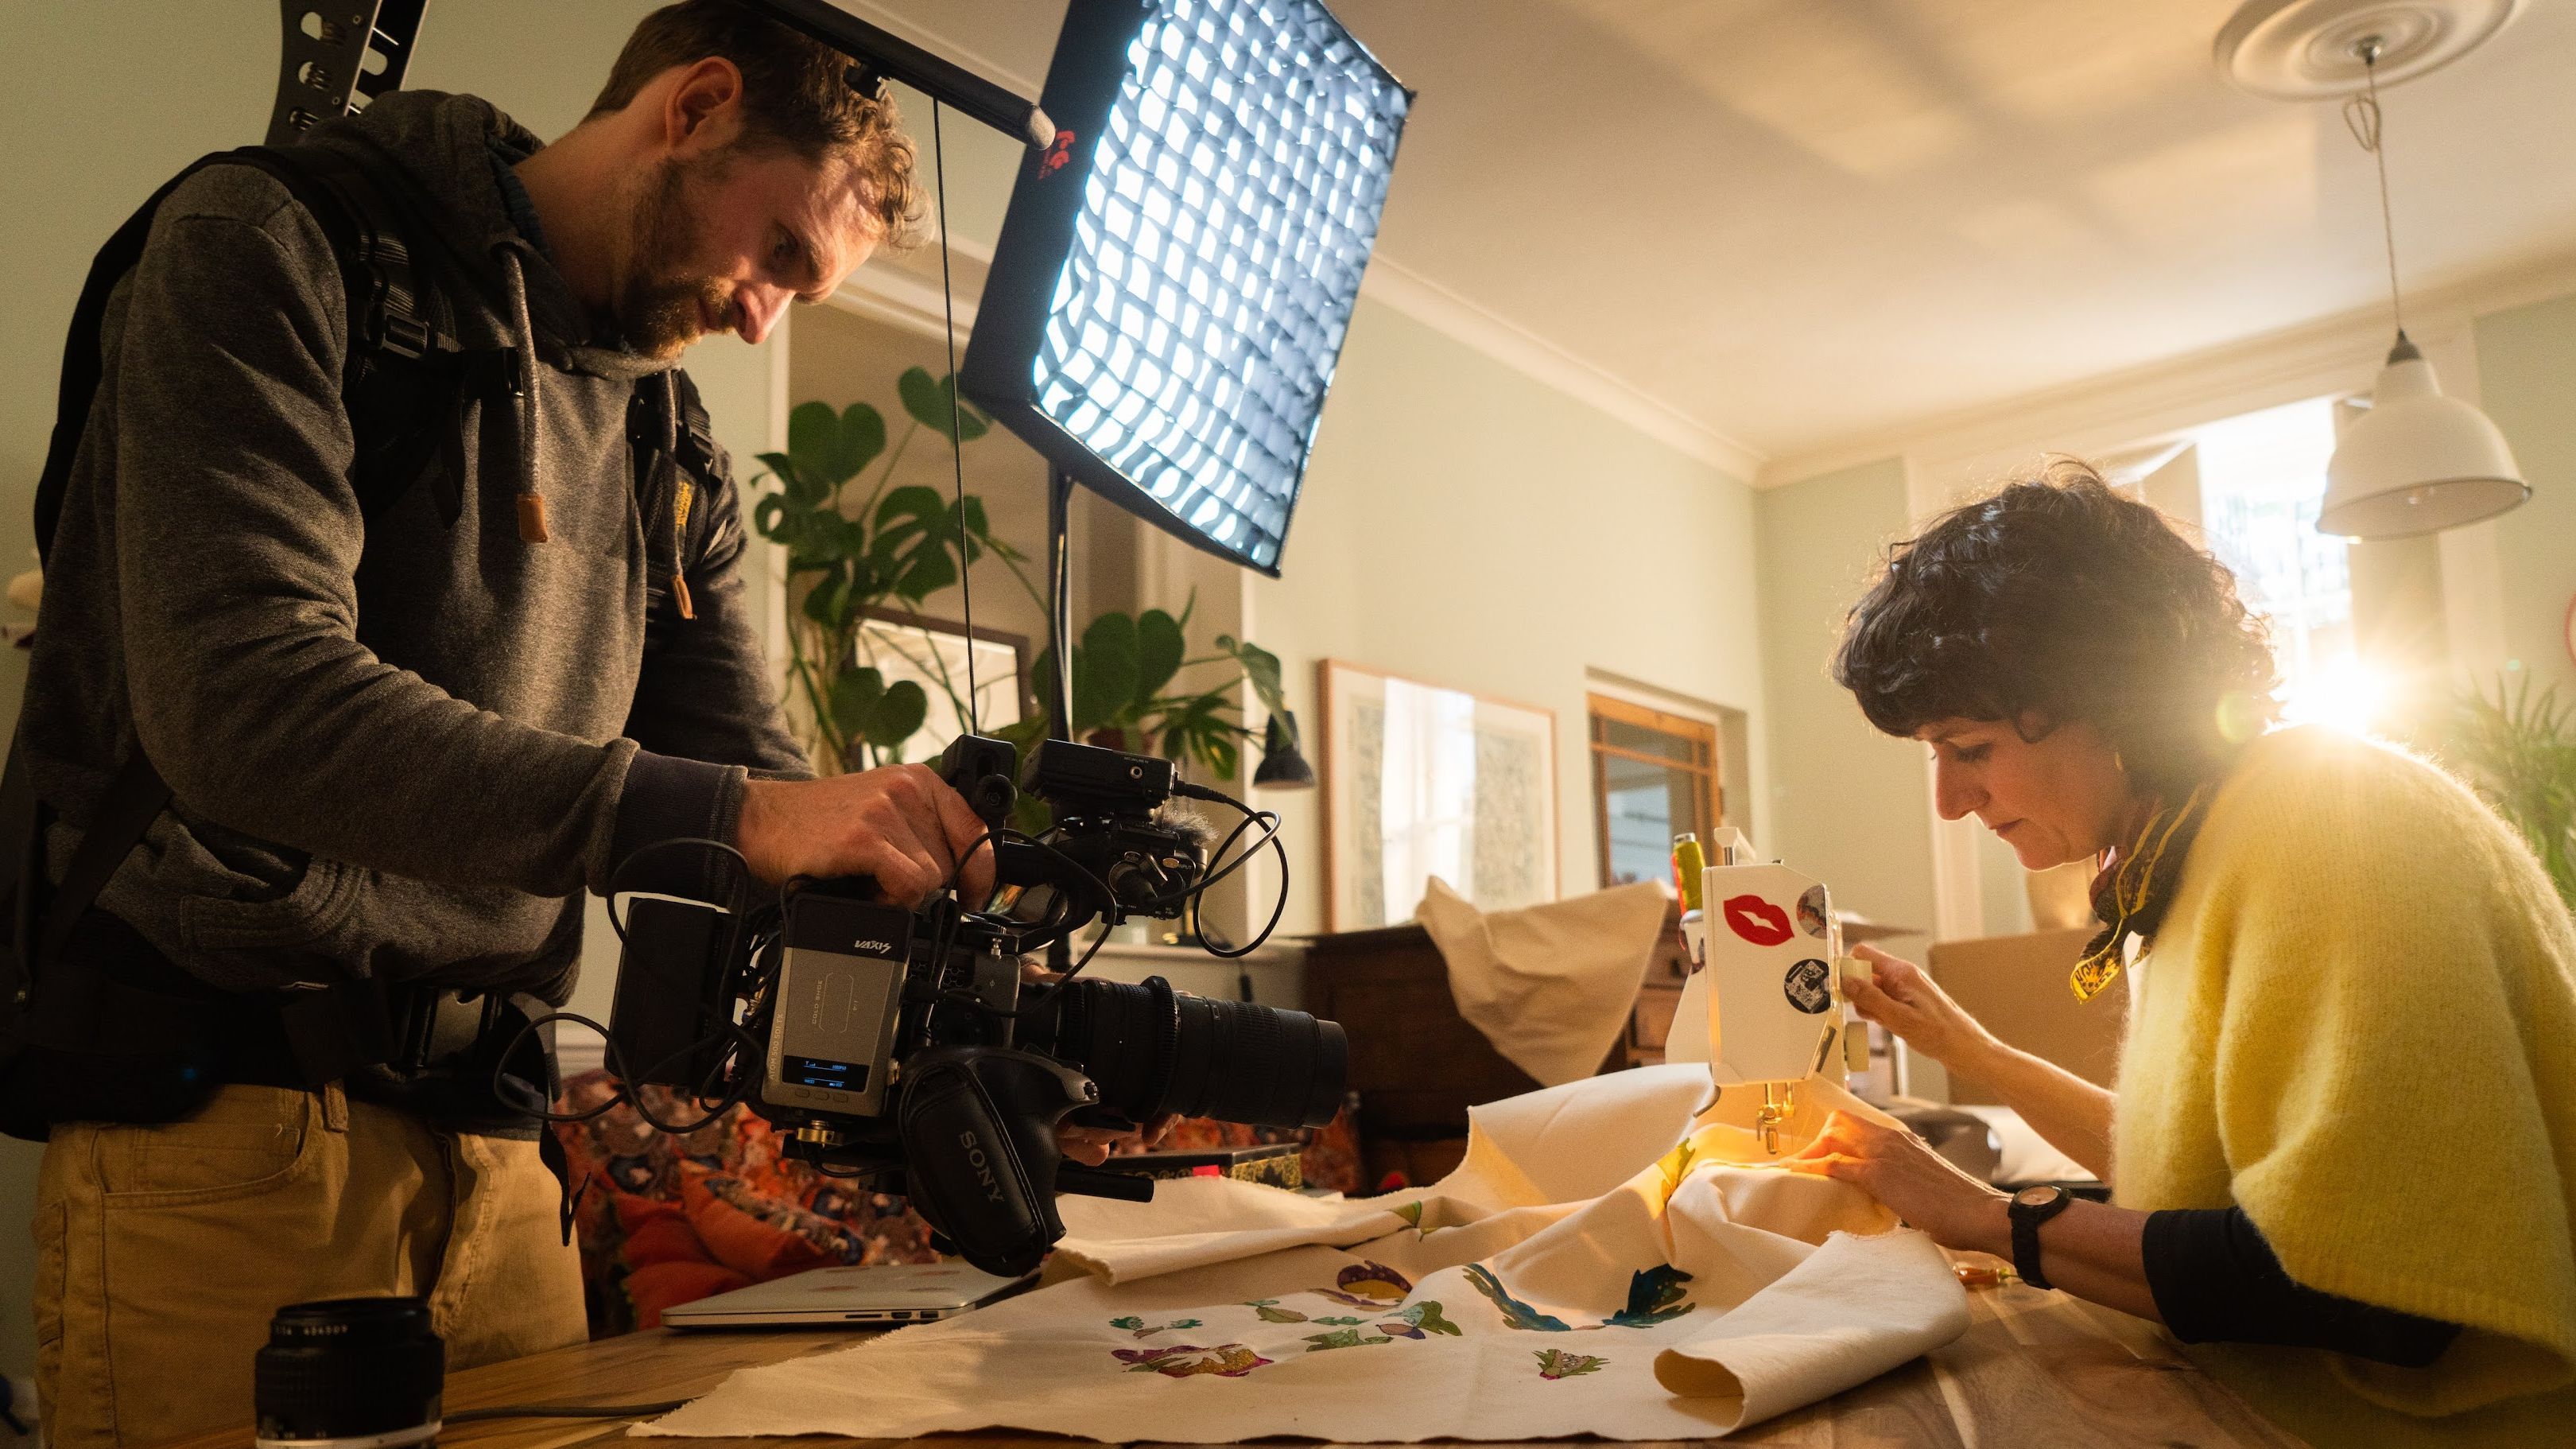
You can use a reflector, a bed sheet, or an artificial light, depending on your budget. Position the key light on the same side as your main motivating light source to maintain a natural look and create a beautiful shadow on the opposite side of your subject's face.
Soften the light using diffusion (a shower curtain, baking paper, or a proper softbox all work). Soft light wraps around your subject and creates a gentle, flattering look that hides skin imperfections and feels more natural on camera.
If you're working with natural light for your documentary, a simple reflector bouncing window light back onto your subject's face does the same job as an expensive LED panel.

Step 4: Create and Control Shadows
Shadows are what make your 2D image appear 3D. Without them, your footage looks like a corporate video call.
To create or deepen shadows, use flags (any opaque material), grids, or curtains. Control the light spill by using negative fill (a black card or dark fabric on the shadow side of your subject). This technique is sometimes called "subtractive lighting" because you're removing light rather than adding it.
Aim for a checkerboard pattern with alternating dark and light areas across your frame. Dark foreground, bright subject, dark background, or the reverse. This creates visual depth that draws the viewer's eye exactly where you want it.
This approach to camera angles and composition combined with good lighting is what separates a snapshot from a cinematic shot.

Bonus Tip: Use Reflections for Extra Visual Interest
Adding reflections to your shots creates additional points of interest and enhances the checkerboard lighting effect.
Capture reflections by positioning your camera close to reflective surfaces (glass, water, polished tables) and making sure the foreground is darker than the background. The reflection adds a whole new layer to your composition without costing you a thing.
I stumbled onto this technique while filming in a cramped restaurant for a documentary. The table reflected the practical lights behind my subject, and suddenly a boring wide shot became something I was genuinely proud of.

Budget Lighting Gear That Works
You don't need a Hollywood budget to light cinematically. Here's what I recommend for filmmakers starting out:
Under $50: A 5-in-1 reflector (around $20), a shower curtain for diffusion, black poster board for negative fill, and a cheap clamp light from the hardware store with a daylight-balanced bulb.
Under $200: A single LED panel like the Aputure Amaran 60d or a Godox SL60W gives you a reliable, dimmable key light. Pair it with the reflector and black card from above, and you have a simple but effective two-light setup.
Under $500: Add a second LED light and a proper C-stand with a flag. This gives you full control over a basic three-point lighting setup (key, fill, backlight) in any location.
The four steps in this post work with any of these setups, or with zero gear at all if you're filming with natural light.
Putting It All Together
Cinematic lighting is not about the gear. It's about understanding how light creates mood, depth, and emotion. By following these four steps on every shoot, you can transform flat, boring footage into something that looks and feels professional.
If you want to go deeper into how these techniques fit into the full documentary production process, check out my step-by-step guide to making a documentary. And if you're shooting interviews (where lighting matters most), my guide to filming cinematic documentary interviews covers the lighting setup I use for every sit-down.
Frequently Asked Questions
How do you learn cinematic lighting?
Start by studying the light in films you admire. Pause scenes and ask: where is the light coming from? Then practice the four-step process above on every shoot. Motivated lighting, backlighting, adding a key, and shaping shadows. You learn lighting by doing it repeatedly, not by reading about it.
What is the 3-point lighting rule?
Three-point lighting uses three light sources: a key light (your main light), a fill light (softer, on the opposite side to reduce harsh shadows), and a backlight (behind the subject to separate them from the background). It's the standard setup for interviews and narrative scenes. The four steps in this post build toward a version of three-point lighting using whatever gear you have available.
What is the 60/30/10 lighting rule in filmmaking?
The 60/30/10 rule is a guideline for balancing light intensity across your scene. About 60% of the light comes from your key light, 30% from your fill, and 10% from accent or background lights. It's a useful starting point, but trust your eyes over any formula. Every scene is different.
Can you get cinematic lighting without expensive equipment?
Yes. A window, a $20 reflector, and a dark blanket for negative fill can produce beautiful cinematic results. The techniques in this guide work with natural light and household items. Expensive gear gives you more control and consistency, but it's not required for a cinematic look.
What is motivated lighting in film?
Motivated lighting means your artificial lights mimic or enhance a light source that already exists in the scene, like a window, a lamp, or a streetlight. It makes your lighting look natural and believable. Every cinematic lighting setup should start by identifying the motivated source, which is why it's Step 1 in the process above.
Free Filmmaking Training
Want to take your cinematic skills further? Get my free training covering 10 techniques for creating cinematic documentaries: 10 Secrets to Creating Cinematic Documentaries.