How to Edit a Documentary Film: 10-Step Workflow
Editing is where your documentary actually becomes a film, and having a step-by-step process to edit your documentary can save you months of frustration.
I've been editing documentaries for over 15 years. In that time, I've developed a documentary editing workflow that takes you from raw footage to finished film without losing your mind along the way.
Below, I'll walk you through every stage of the documentary editing process, from organising your footage to final delivery. This workflow will give you the clarity to move forward, no matter how much footage you're sitting on.

In This Post
- What Is Documentary Editing?
- Why Editing Matters in Documentary Filmmaking
- What Editing Software Should I Use?
- How To Start Editing a Documentary
- The 10 Stages of Documentary Editing
- How Long Does It Take to Edit a Documentary?
- Common Documentary Editing Mistakes
- FAQ
What Is Documentary Editing?
Documentary editing is the art of weaving together raw footage to tell a real-life story. Unlike scripted films where scenes follow a predetermined narrative, documentaries start with hours of footage, interviews, and B-roll. The editor's job is to sift through all of it, find the key moments, emotions, and narrative threads, then shape them into a cohesive film.
Through pacing, sequence arrangement, and thematic focus, the editor sculpts reality into a cinematic experience that moves the audience. It's part craft, part instinct, and it's where the real filmmaking happens.
Why Editing Matters in Documentary Filmmaking
Editing is the unsung hero of documentary filmmaking. It's in the editing room where the true shape and direction of the narrative come to life. The process determines the pacing, tone, and structure. It highlights the most pivotal moments and makes sure they land with the audience.
It's the editor's eye that decides what to keep, what to cut, and how to weave together interviews, B-roll, and other elements into something that feels inevitable. A good documentary is made in the edit. I've seen it again and again across my own projects and the student films I've reviewed through the Documentary Fundamentals course.

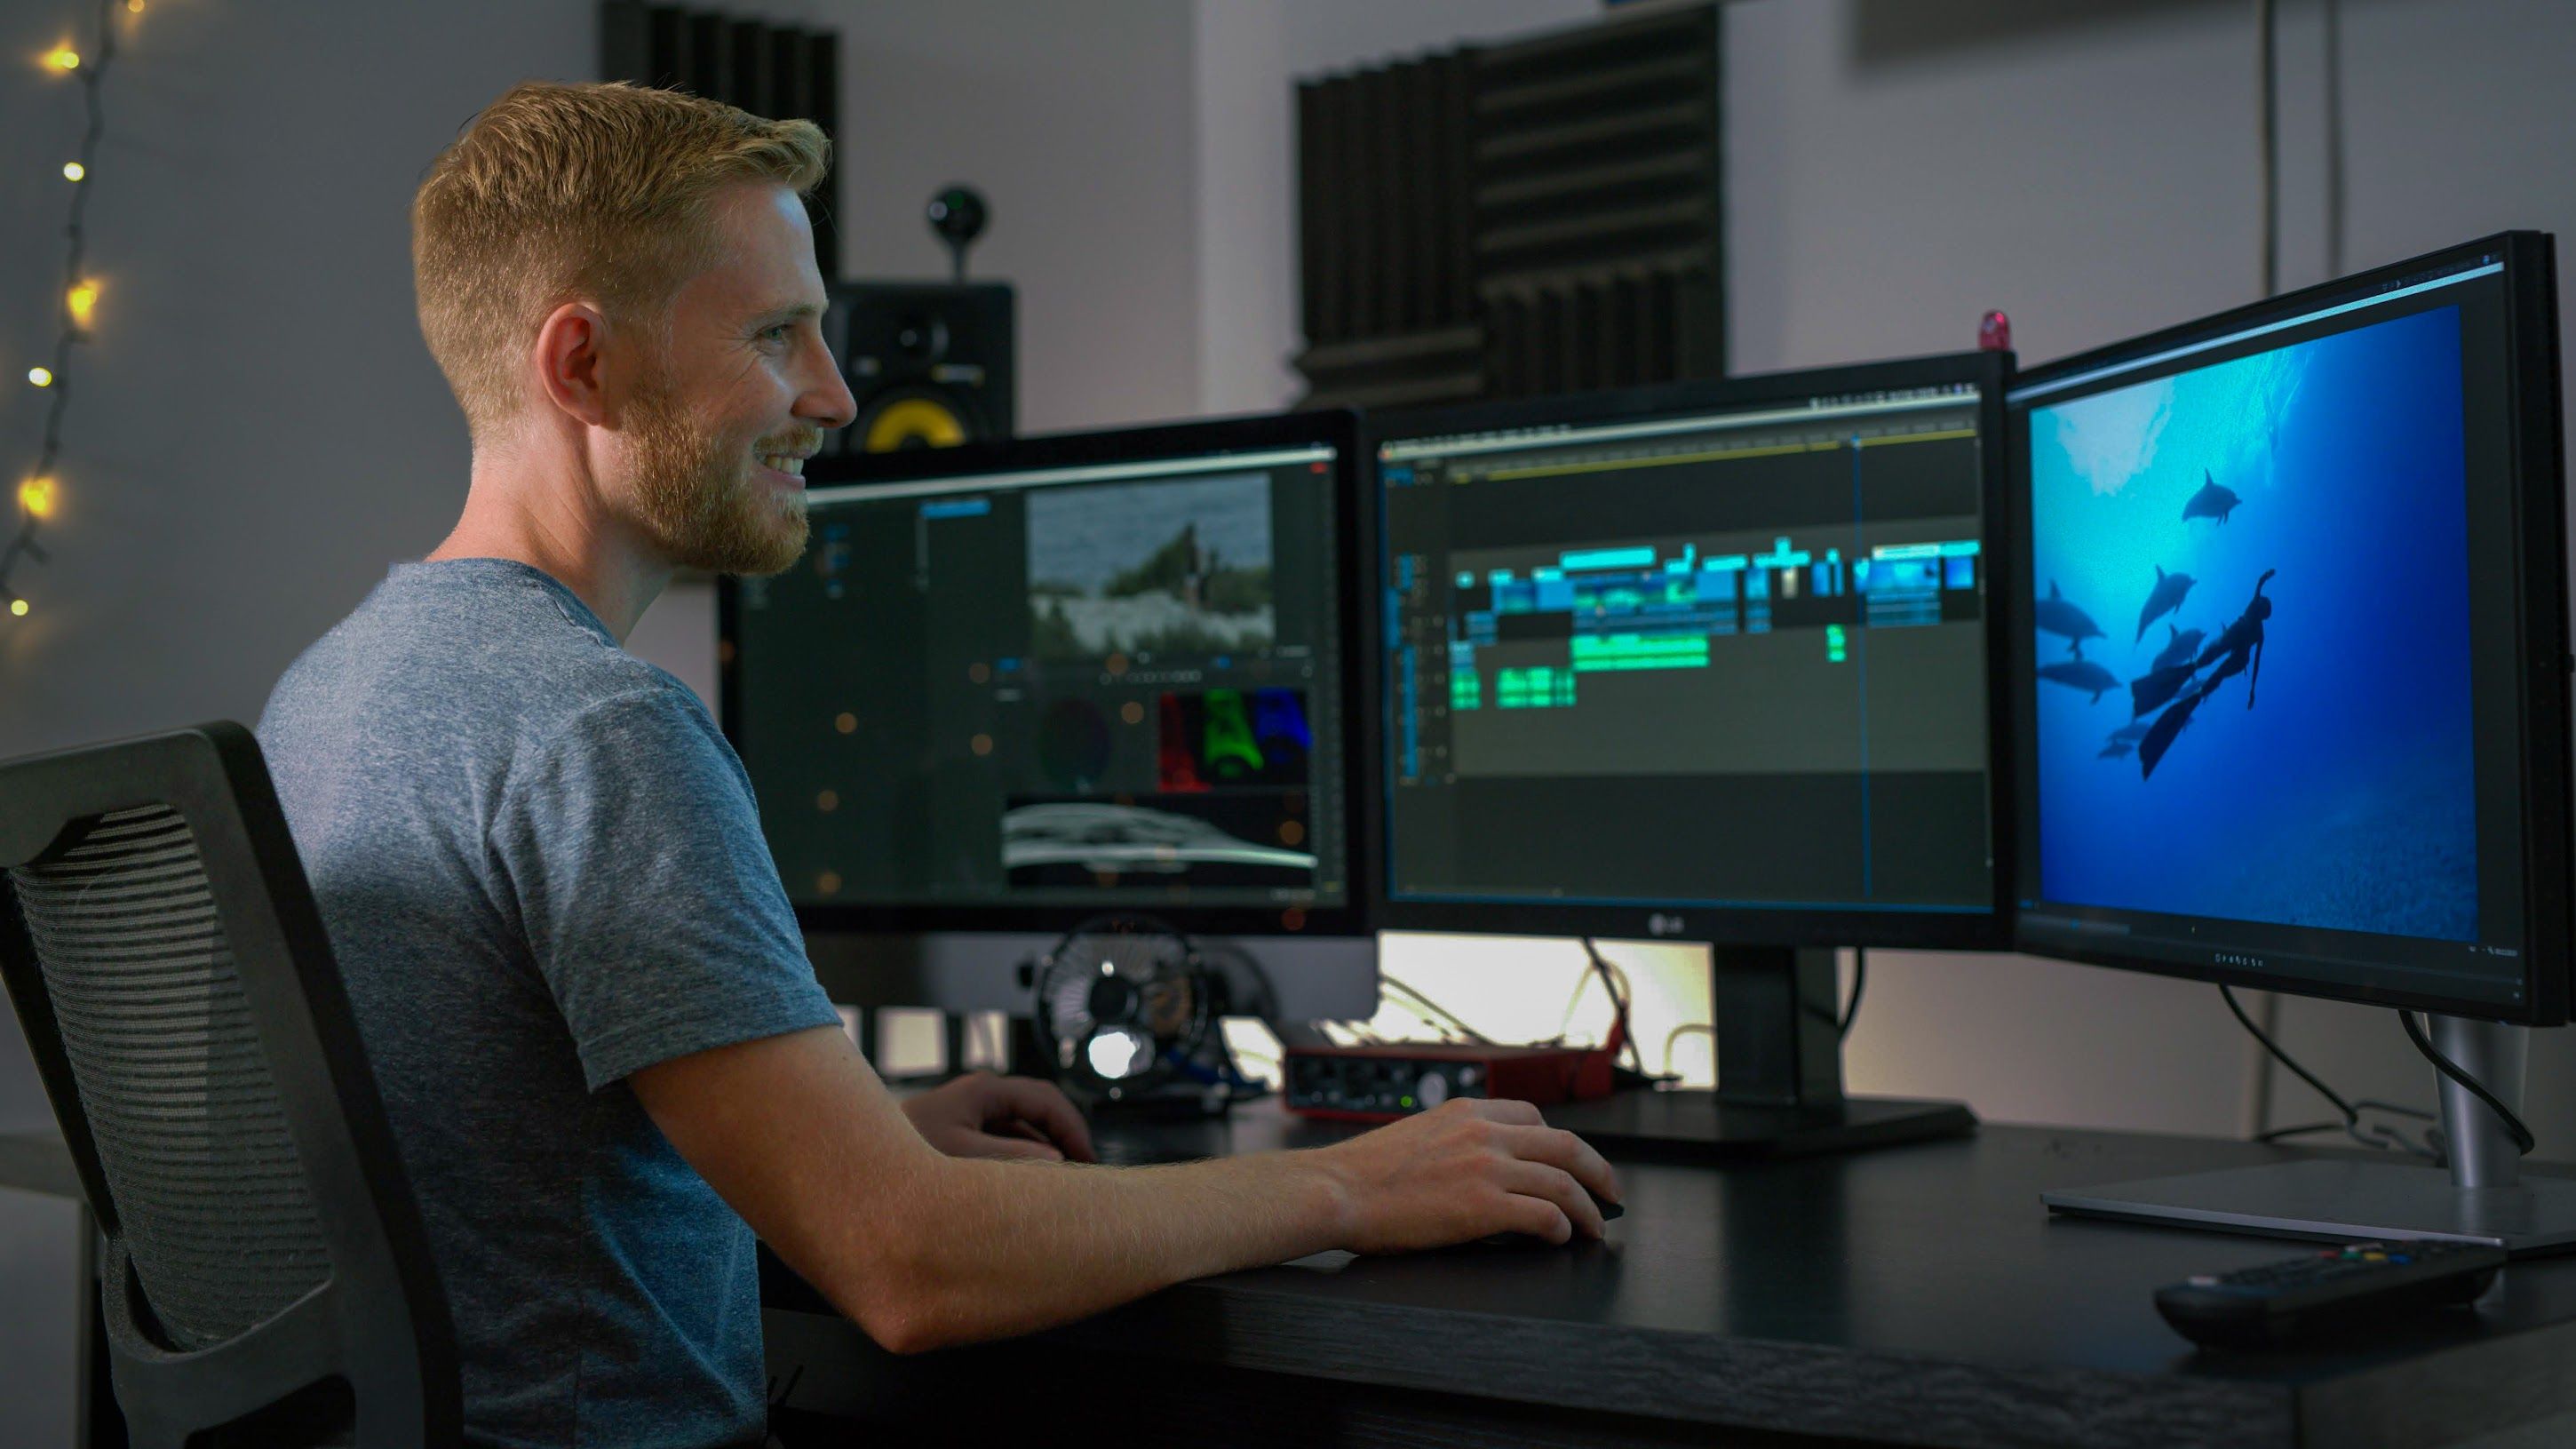
What Editing Software Should I Use?
The best choice depends on your needs and experience level. For beginners, iMovie or CapCut offer user-friendly interfaces to get you started.
For professional documentary work, Adobe Premiere Pro is widely used for its advanced features and flexibility. Final Cut Pro is another strong option, especially for Mac users. Avid Media Composer is the industry standard in film and television, known for its collaborative features.
If colour grading is a priority, DaVinci Resolve is a great option and has a free version that's surprisingly powerful. I personally use Premiere Pro for most of my documentary projects because the integration with other Adobe tools speeds up my workflow.
Try the free trial versions before committing to any software. The best documentary editing software is the one that fits your project, your budget, and the way you like to work.
How To Start Editing a Documentary
Many first-time filmmakers start super excited about making their documentary. They put a lot of time and effort into filming it, but then when they get to editing, they don't know what to do next. They get stuck, 'cause they don't know how to organise and structure all the footage they've filmed into a cohesive and cinematic story that will move and inspire people.
And sadly, because of the lack of clarity on how to move forward and the feeling of being overwhelmed whenever they look at all the unedited footage, their documentary gets abandoned and forgotten about.
So to make sure this doesn't happen to you, I'm going to run through my entire documentary editing workflow from start to finish. I've developed this process over the last 15 years, and it would have saved me hundreds of hours and a lot of frustration when I was editing my first documentary.
This process will vary depending on the project. There's no single workflow that fits all, so take what works for you and adapt it to your documentary. If you're still in the planning stage, start with our guide on how to make a documentary from scratch.
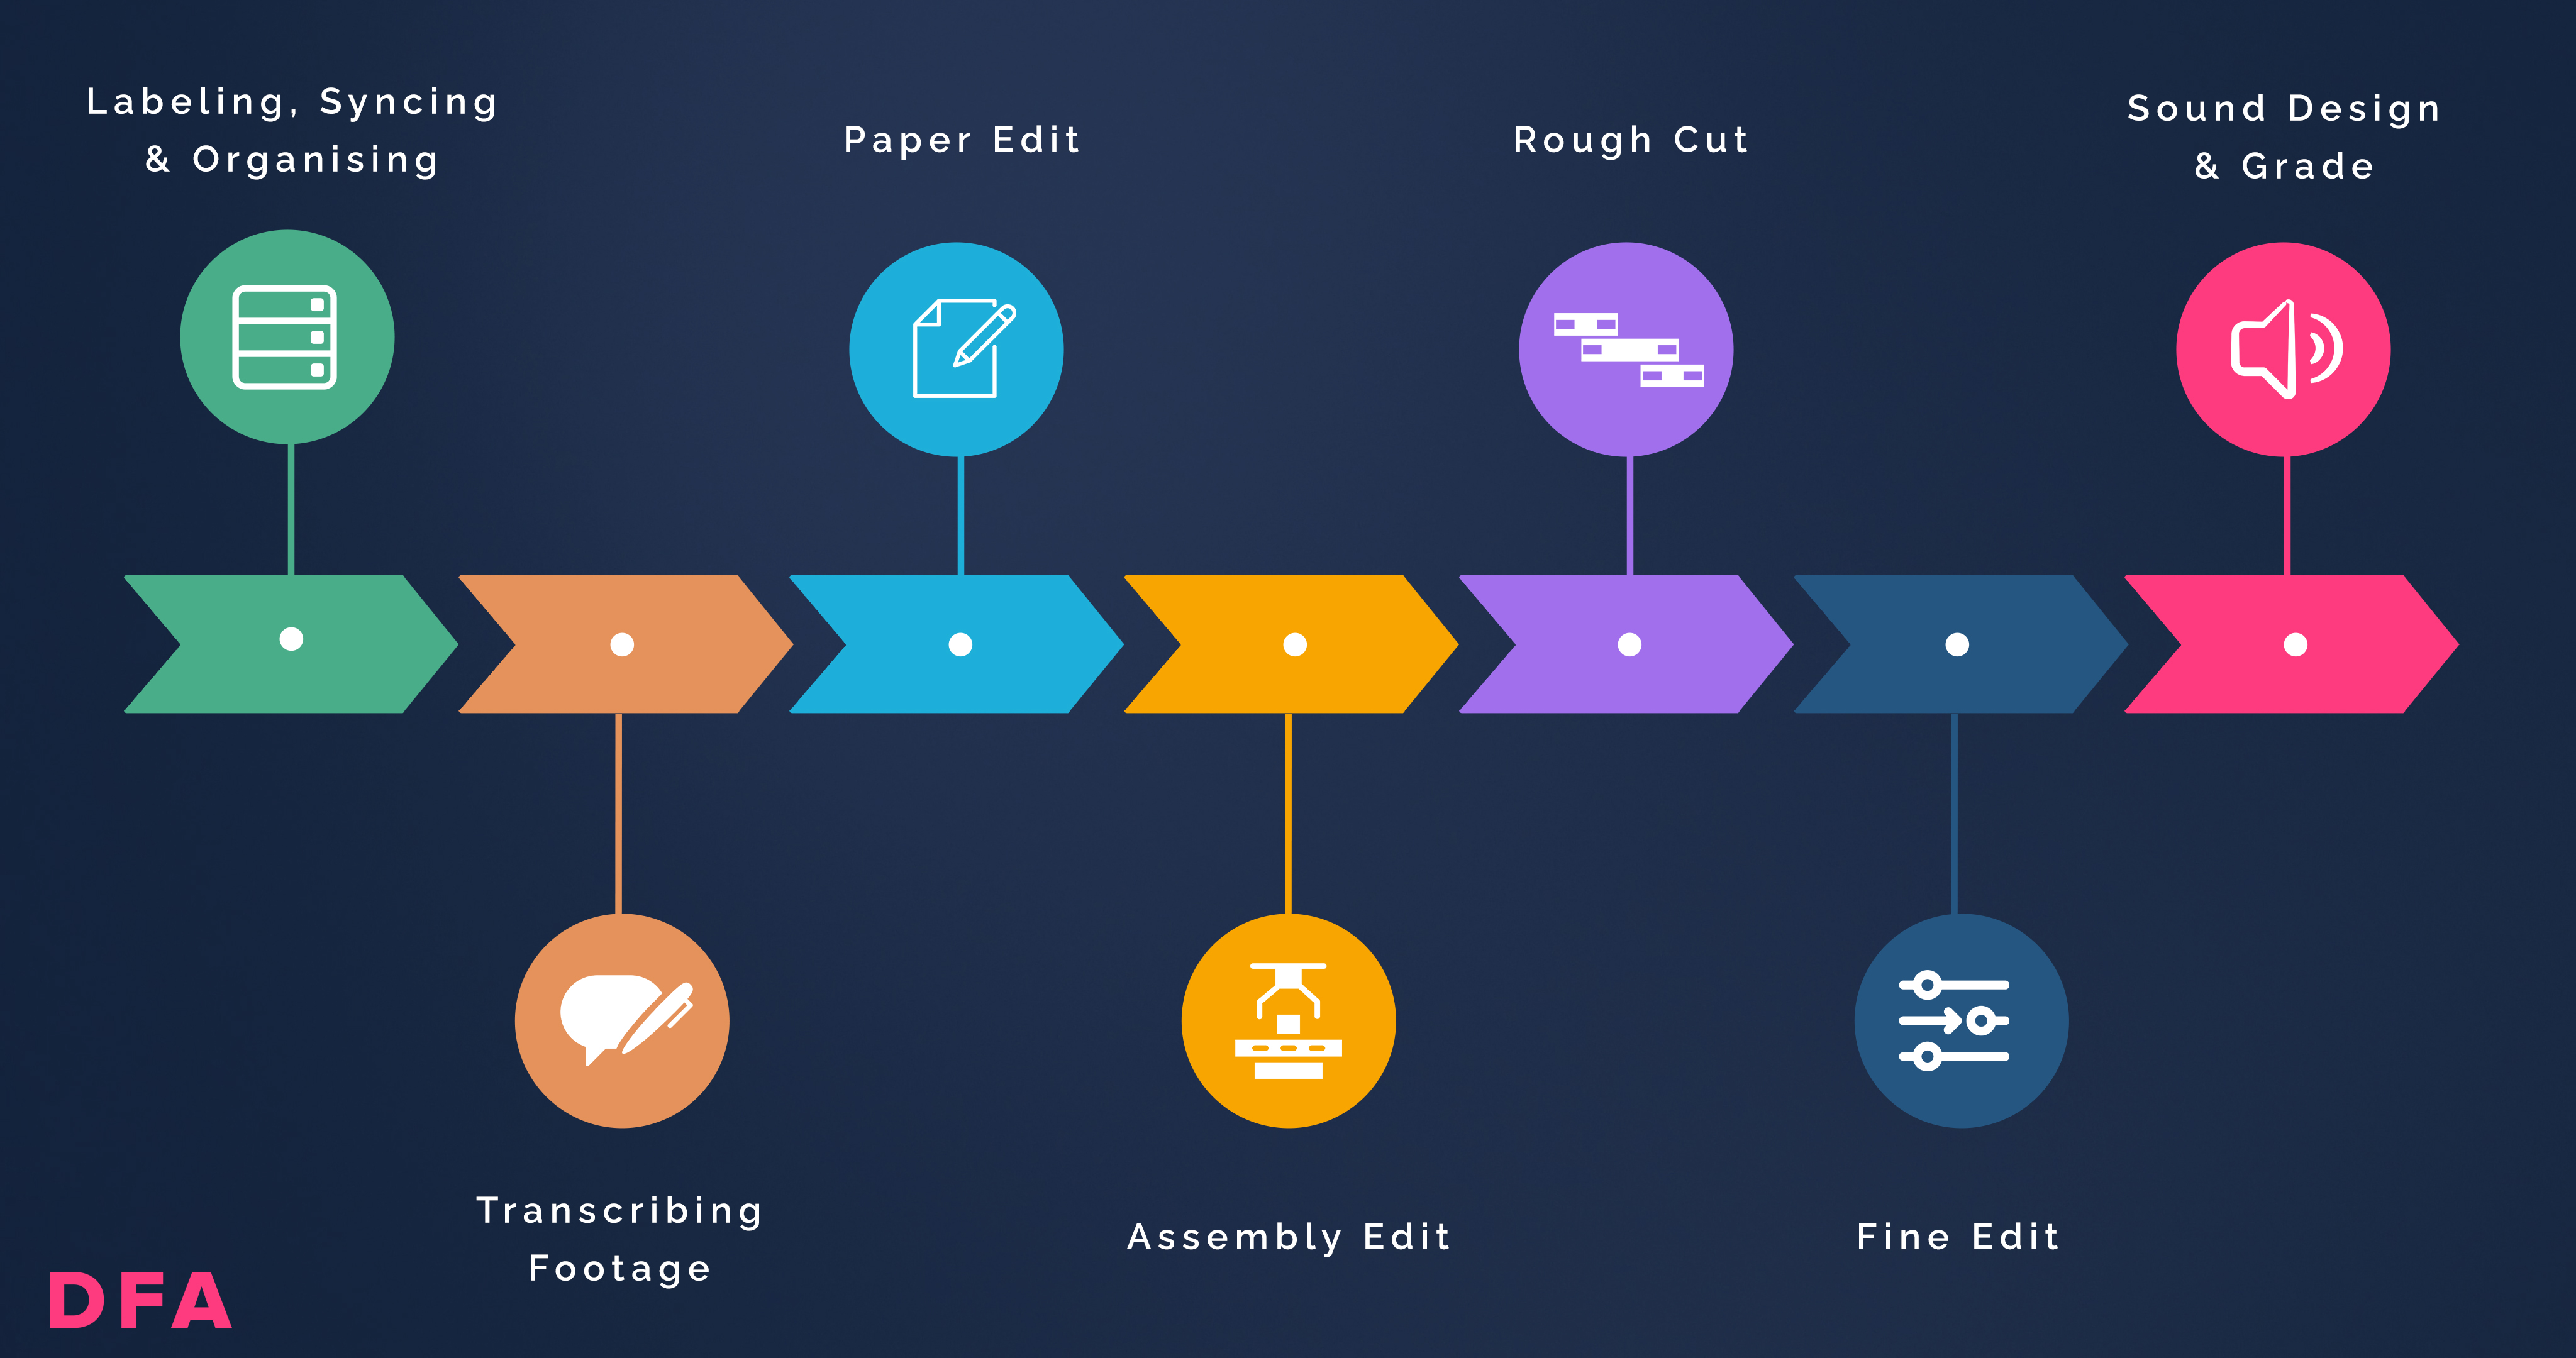
The 10 Stages of Documentary Editing
Here's a step-by-step breakdown of the documentary editing process:
Below is a written breakdown of my editing workflow:
1. Transcoding Your Footage
Transcoding is where you convert a video from one format to another. This is often to reduce the file size or change the format so it plays smoothly inside your editing software.
You can do this by creating proxies using Adobe Media Encoder. Proxies are duplicate files of your source footage that are smaller in data size and lower in resolution than the original. This is really helpful when you're editing 4K, 5K, or even 8K footage. Without proxies, high-resolution footage can really slow down your computer and make editing painful.
If you're using a mirrorless camera or a drone which resets the file name numbers every time you put a new card in (starting at 0001), make sure you rename all your files so clips don't share the same name. You can do this using a free app called Name Changer. If duplicate file names exist and you're toggling proxies on and off, the software won't know which file to link back to. This can mean clips link to the wrong proxy file. Rename all your files if you have duplicate file names.
2. Labelling, Syncing and Organising
Next is labelling, syncing, and organising your documentary assets.
I'm often asked by beginner filmmakers, "If we've shot a huge amount of content, how do we tackle the insane task of cutting it?"
I totally get how overwhelming it is. It often feels like trying to find a needle in a haystack. But what gets me through every time is breaking the process into small bite-sized chunks and organising everything so it's easy to find.
It's really tempting to skip this part because it's boring and you just want to get to the exciting part of crafting your story. But if you don't start by organising your footage, it will waste a lot of time in the long run and cause frustration. Whatever you do, take the time to organise your documentary assets as soon as possible.
I organise all the footage into sequences based on location or scenes, then add markers to describe what the main character is going through, whether that's an action or an emotion. When I get to editing and I'm looking for a certain moment, I can find it quickly just by searching for it.
3. Transcribing Your Footage
Transcribing is where you log all the interviews and footage, writing out exactly what you see and hear, second by second, minute by minute, marked with timecode.
You can do this yourself or pay for a service like Rev or Trint. Transcripts save you so much time because they give you a written version of every interview. You can search for words or phrases without spending hours scrubbing through footage to find them.
Transcripts also let you work on your film when you're not at your computer. When you read through them, you can highlight themes and create colour-coded systems to organise your story and pick out the best moments. This is a great way to discover the threads that run through your documentary.
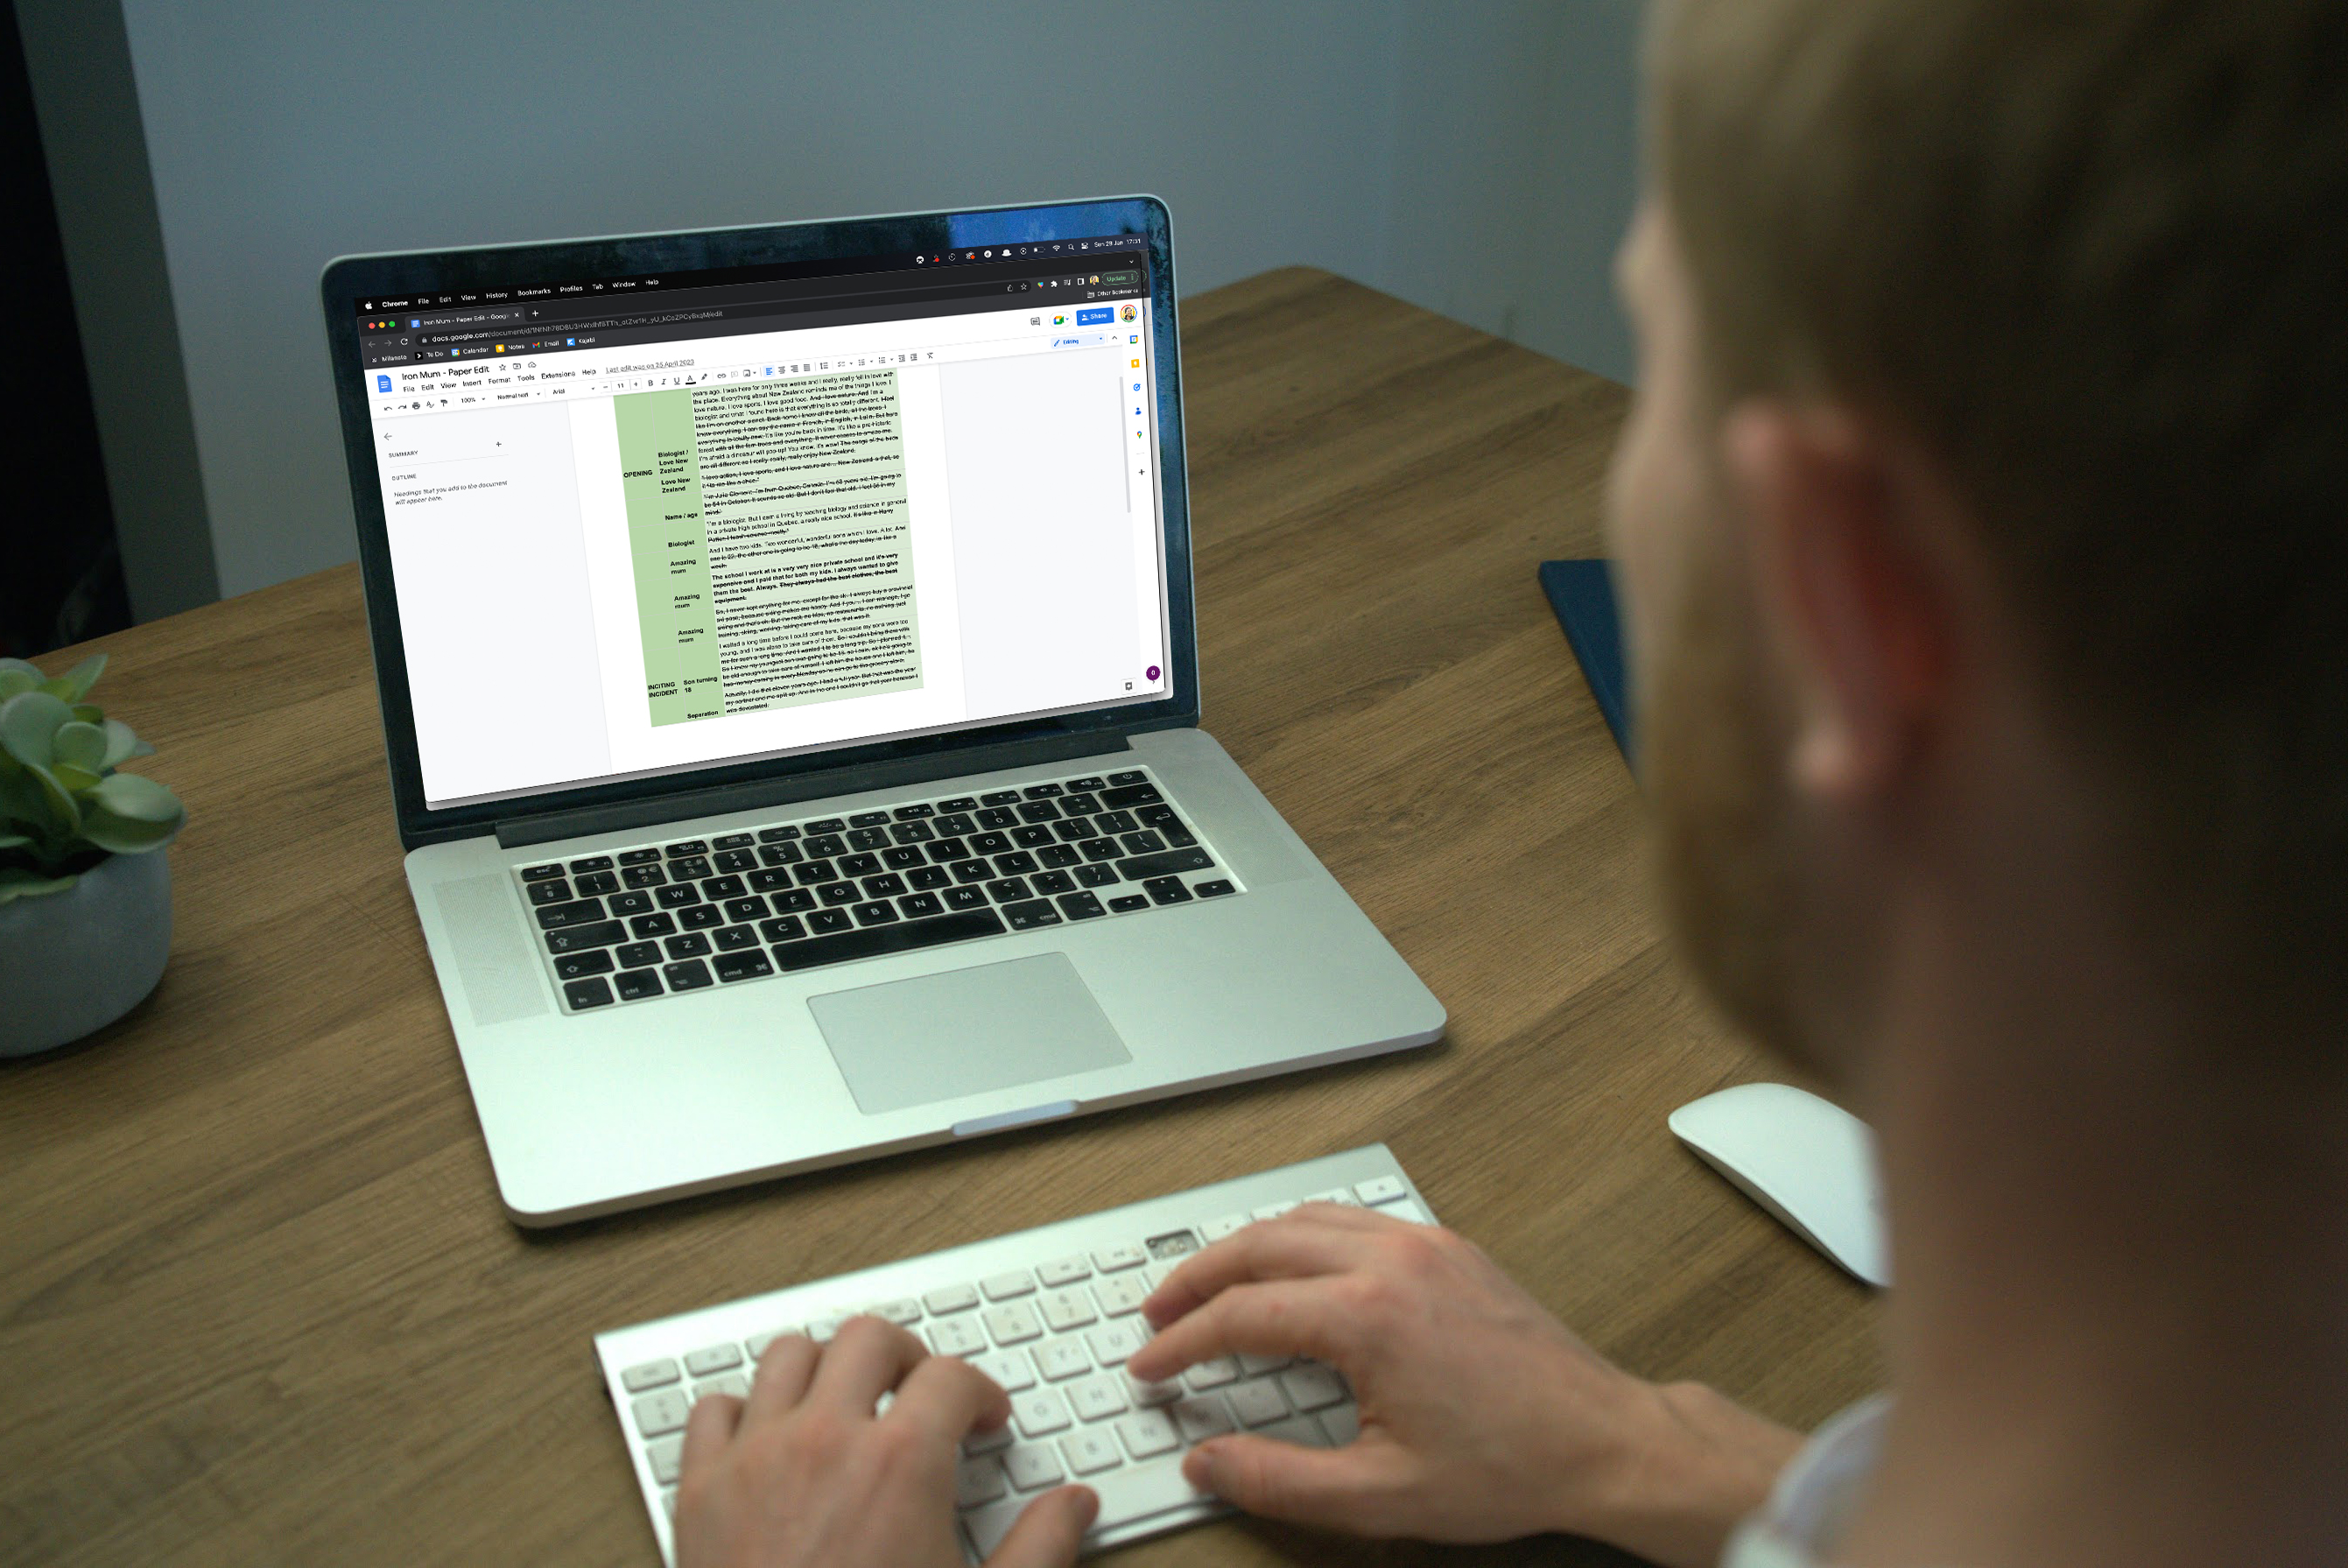
4. Paper Edit
A paper edit is a written version of how you're going to structure your documentary, like a script or blueprint. Not everyone creates one, especially for short films, but I find it helps you be objective about what's working and what's not. Without it, it's easy to get lost in hours of footage.
Paper edits give you an overview of your film and show how all the scenes and characters connect. Software like Trint lets you highlight key moments from the transcript and turn them into a paper edit. Because the text is linked to the video file, it also edits your video as you chop and change the text. This saves huge amounts of time and gets you to the assembly edit much faster. If you want more on structuring your story, read our guide on how to write a documentary script.
5. Assembly Edit
This is where you start to cut your interview footage and B-roll down to the best bits, shaping the film with the help of your paper edit or index cards, or both.
Put together the assembly edit as quickly as you can. Don't be tempted to finesse the edit at this stage. If you do, you'll waste time because you'll probably change things considerably. The assembly gives you the big picture, the overview of what the overall structure will look like, and helps you decide what parts of the story are working and what are not.
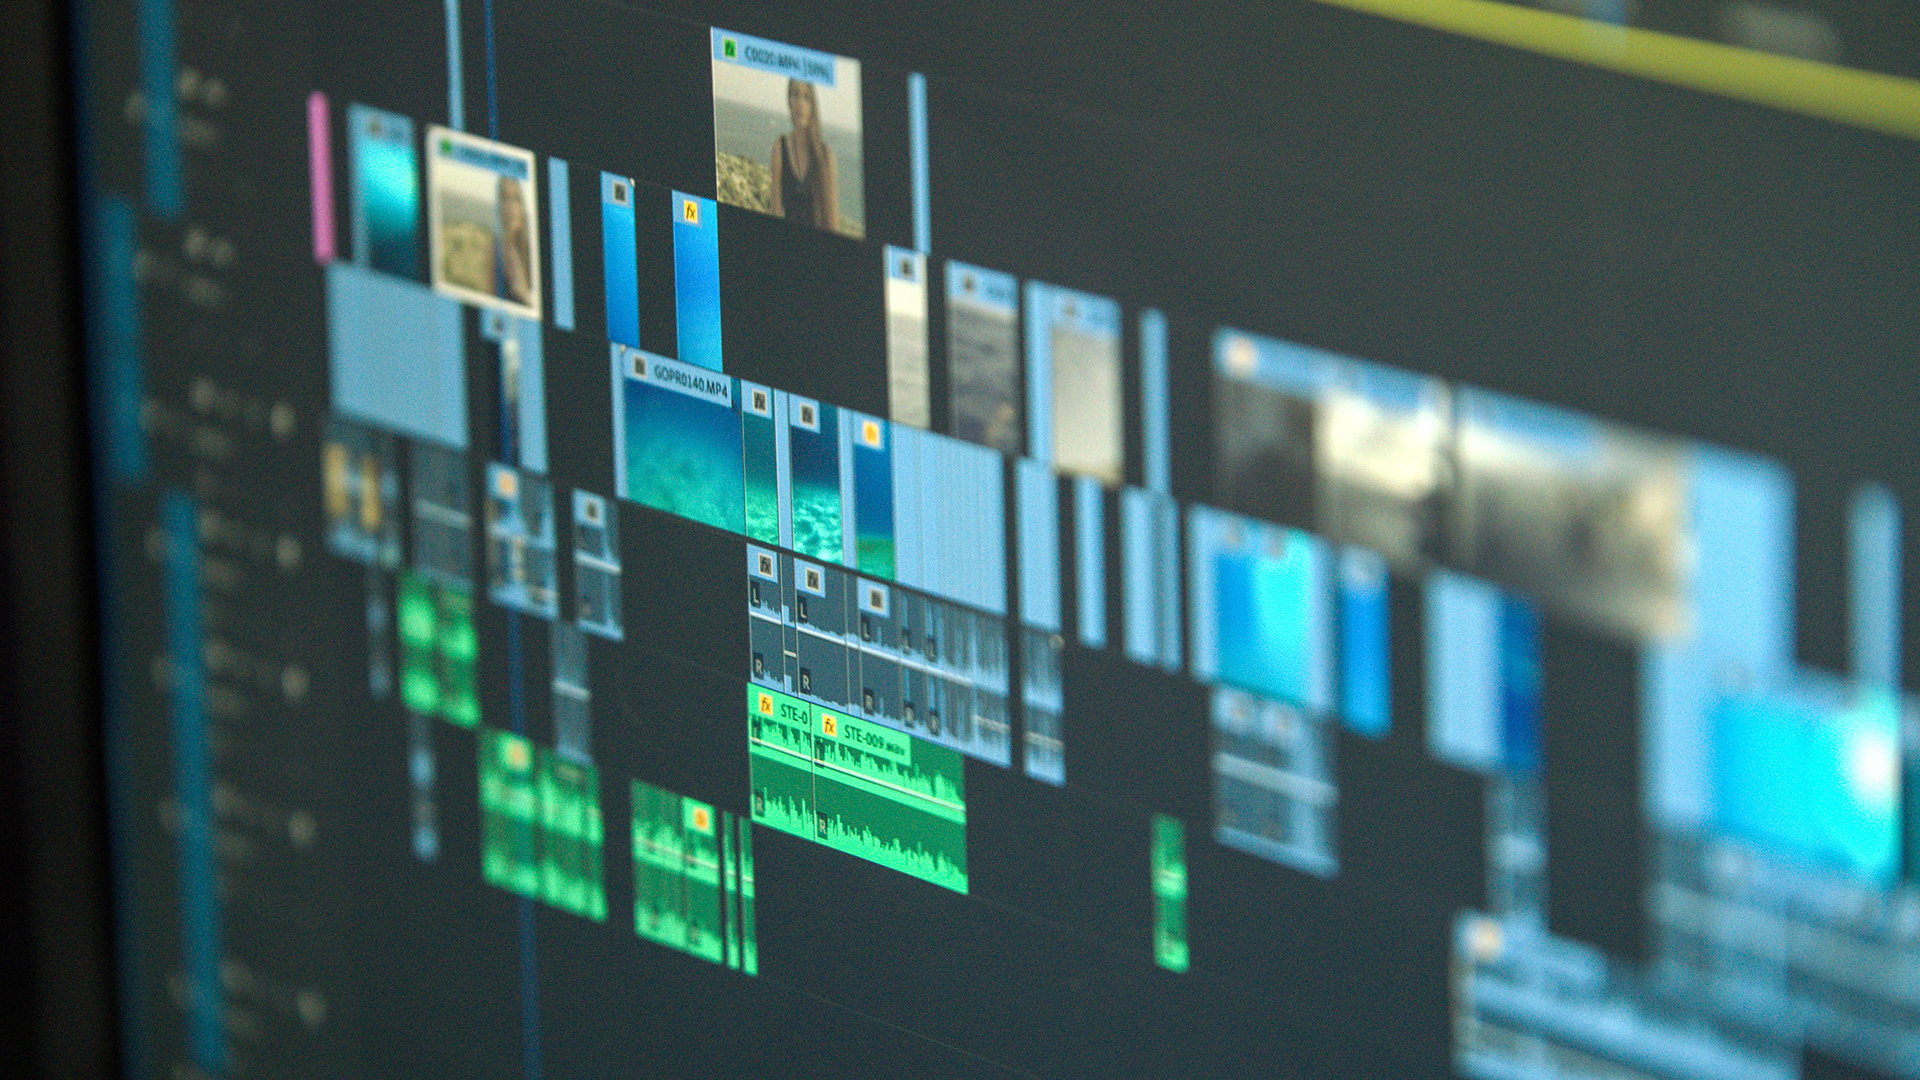
6. Rough Cut
This is where all the footage is in one big timeline and you can start to rearrange it and shape the story arc. You start adding music, sound effects, and transitions to create a rough outline of your documentary.
Most of the blood, sweat, and tears of the editing process happen in getting the film from the assembly to the rough cut. This stage may take several months of hard work. Concentration and attention to detail matter here, and it's often a stressful time. Push through on self-made films because this is where many people slow down and give up. If you need motivation during this phase, our post on building suspense in a documentary can help you shape a more gripping cut.
7. Fine Cut
At this stage of the editing process, you're no longer moving and deleting scenes like you did in the rough cut. You're now just shaving things off. This is where you're fine-tuning a piece that is very close to being finished. By the end of this stage, you want to have "locked the edit," meaning you've finished editing the video clips and are ready to move on to the next stage.
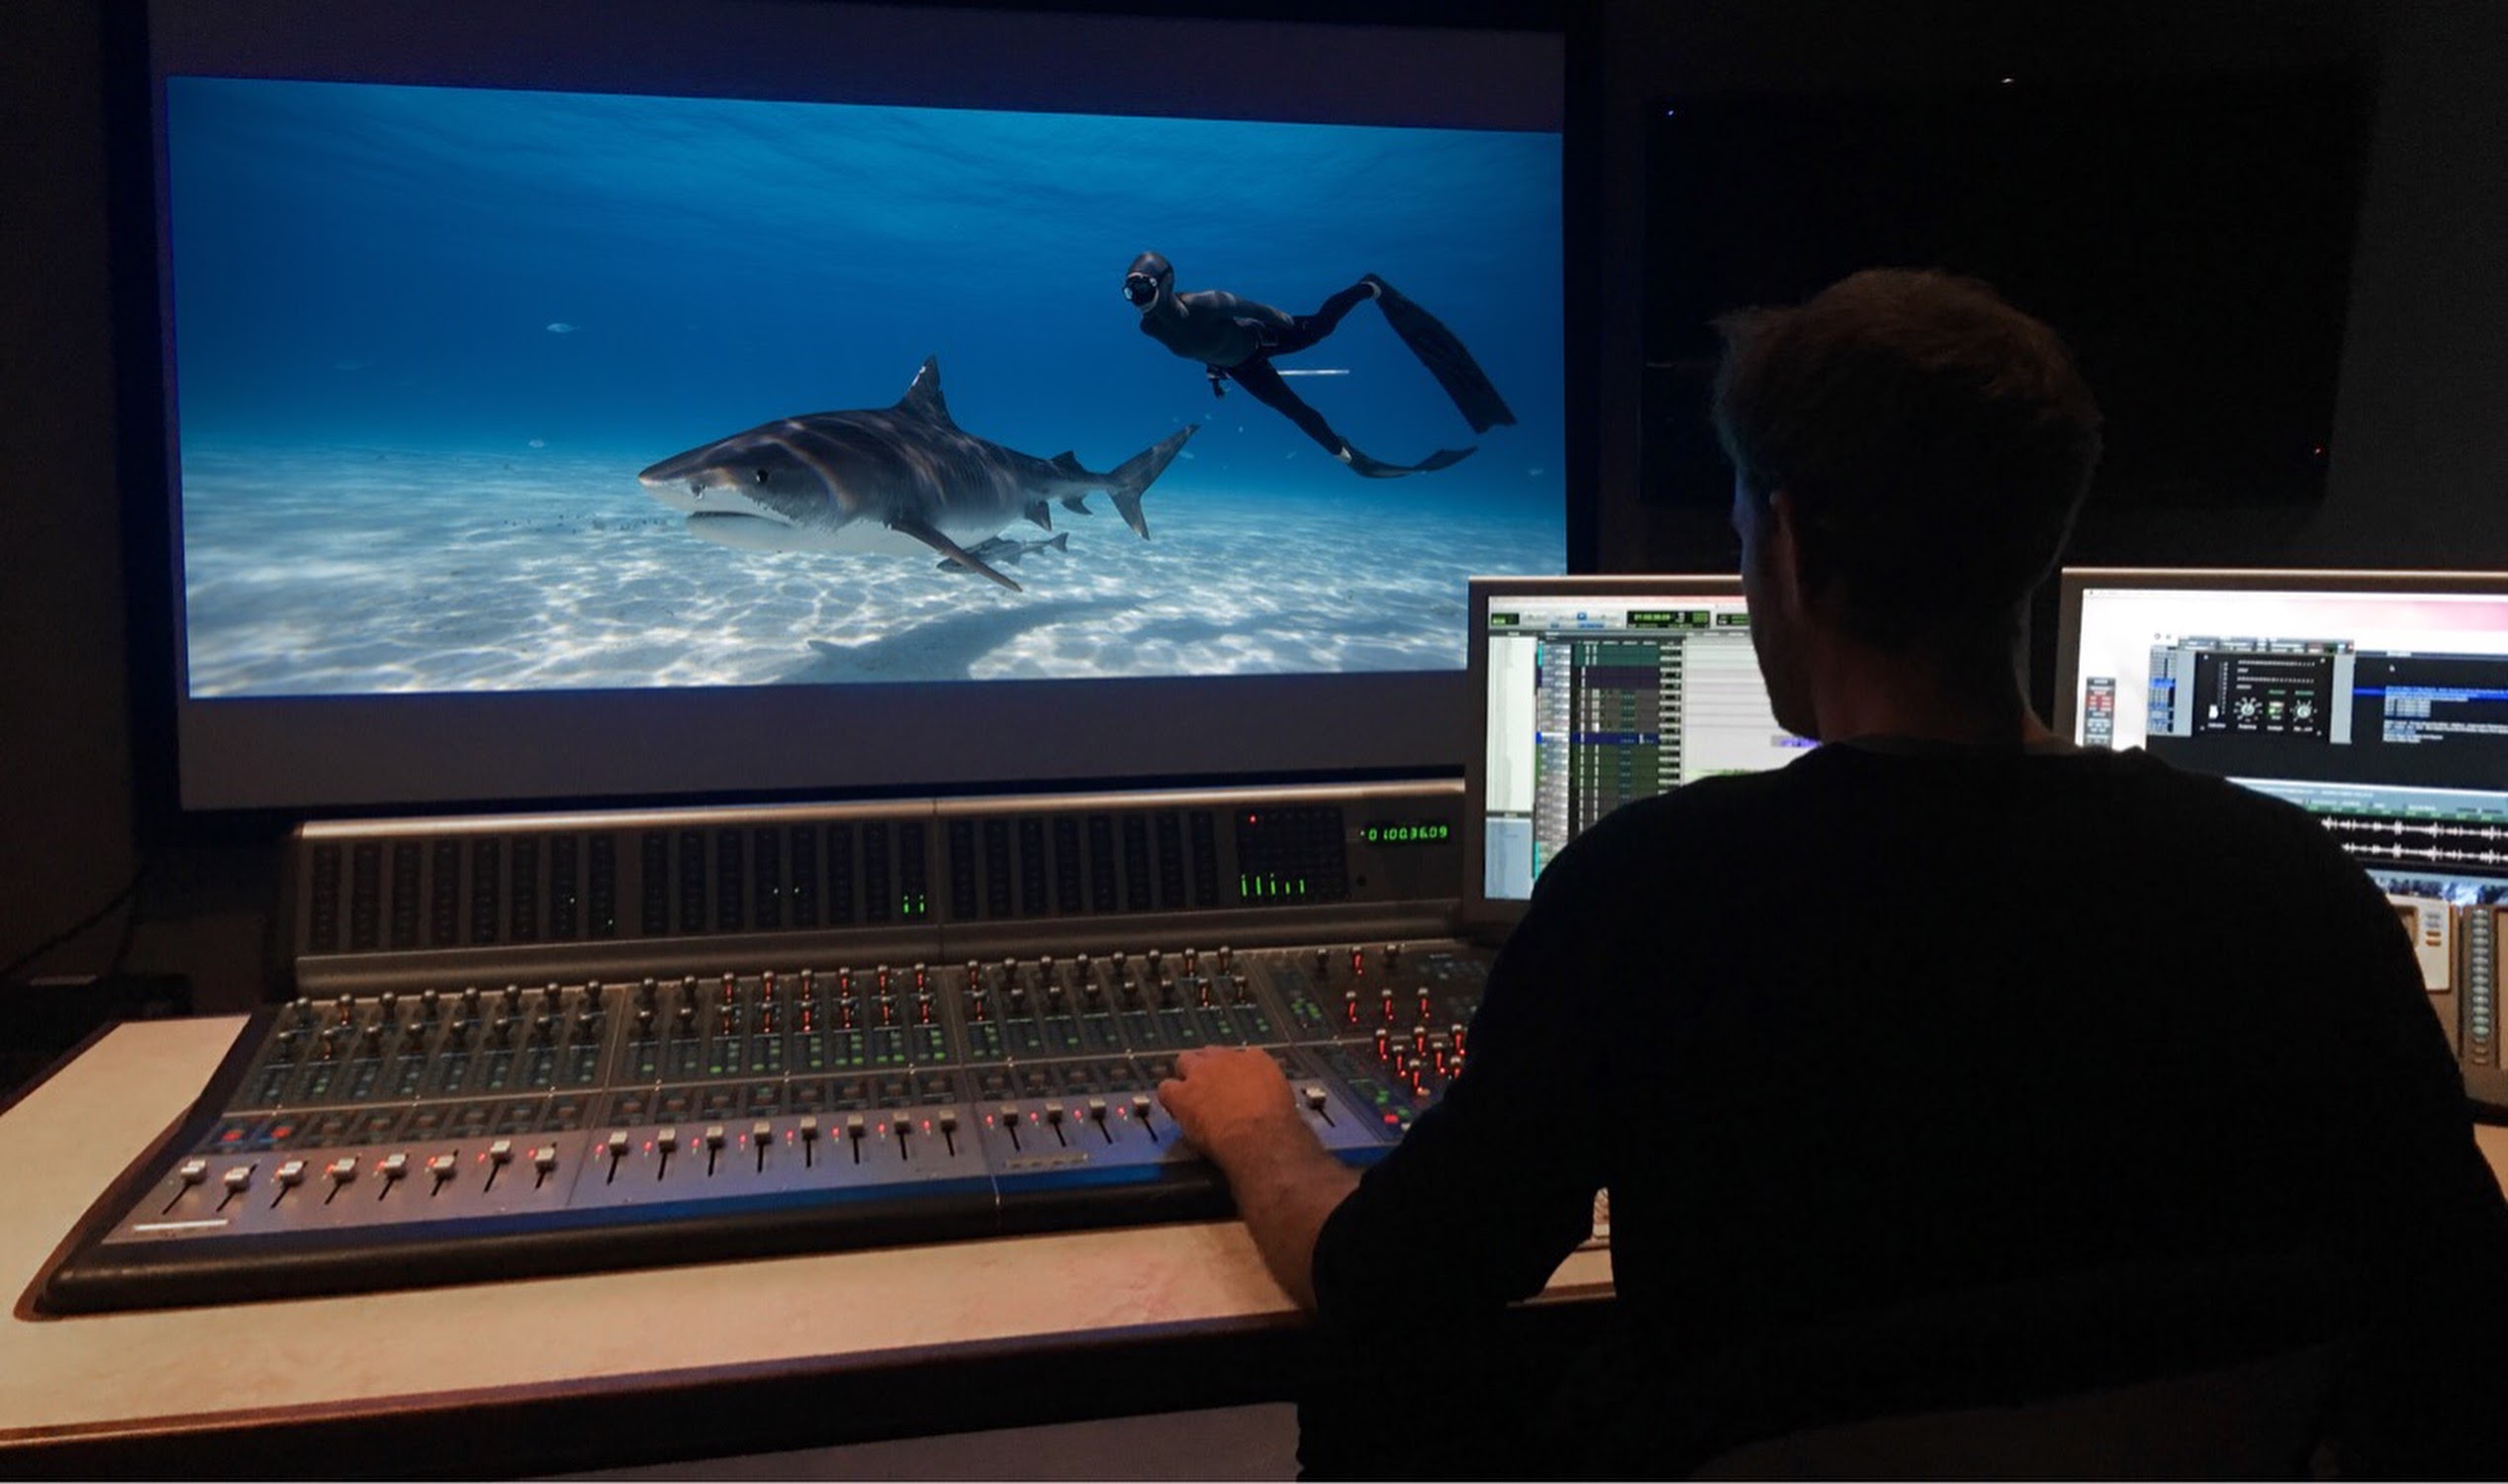
8. Sound Design
Sound design is where you add, remove, mix, and tweak the sound in the documentary to make it feel like the audience is really there, both physically and emotionally. This could mean adding footsteps, wind noises, or the crackles of a campfire.
Sound design helps set the mood, creates tension, and adds layers that visuals alone can't achieve. Great sound design immerses the audience and gives them clues about how a character is feeling.
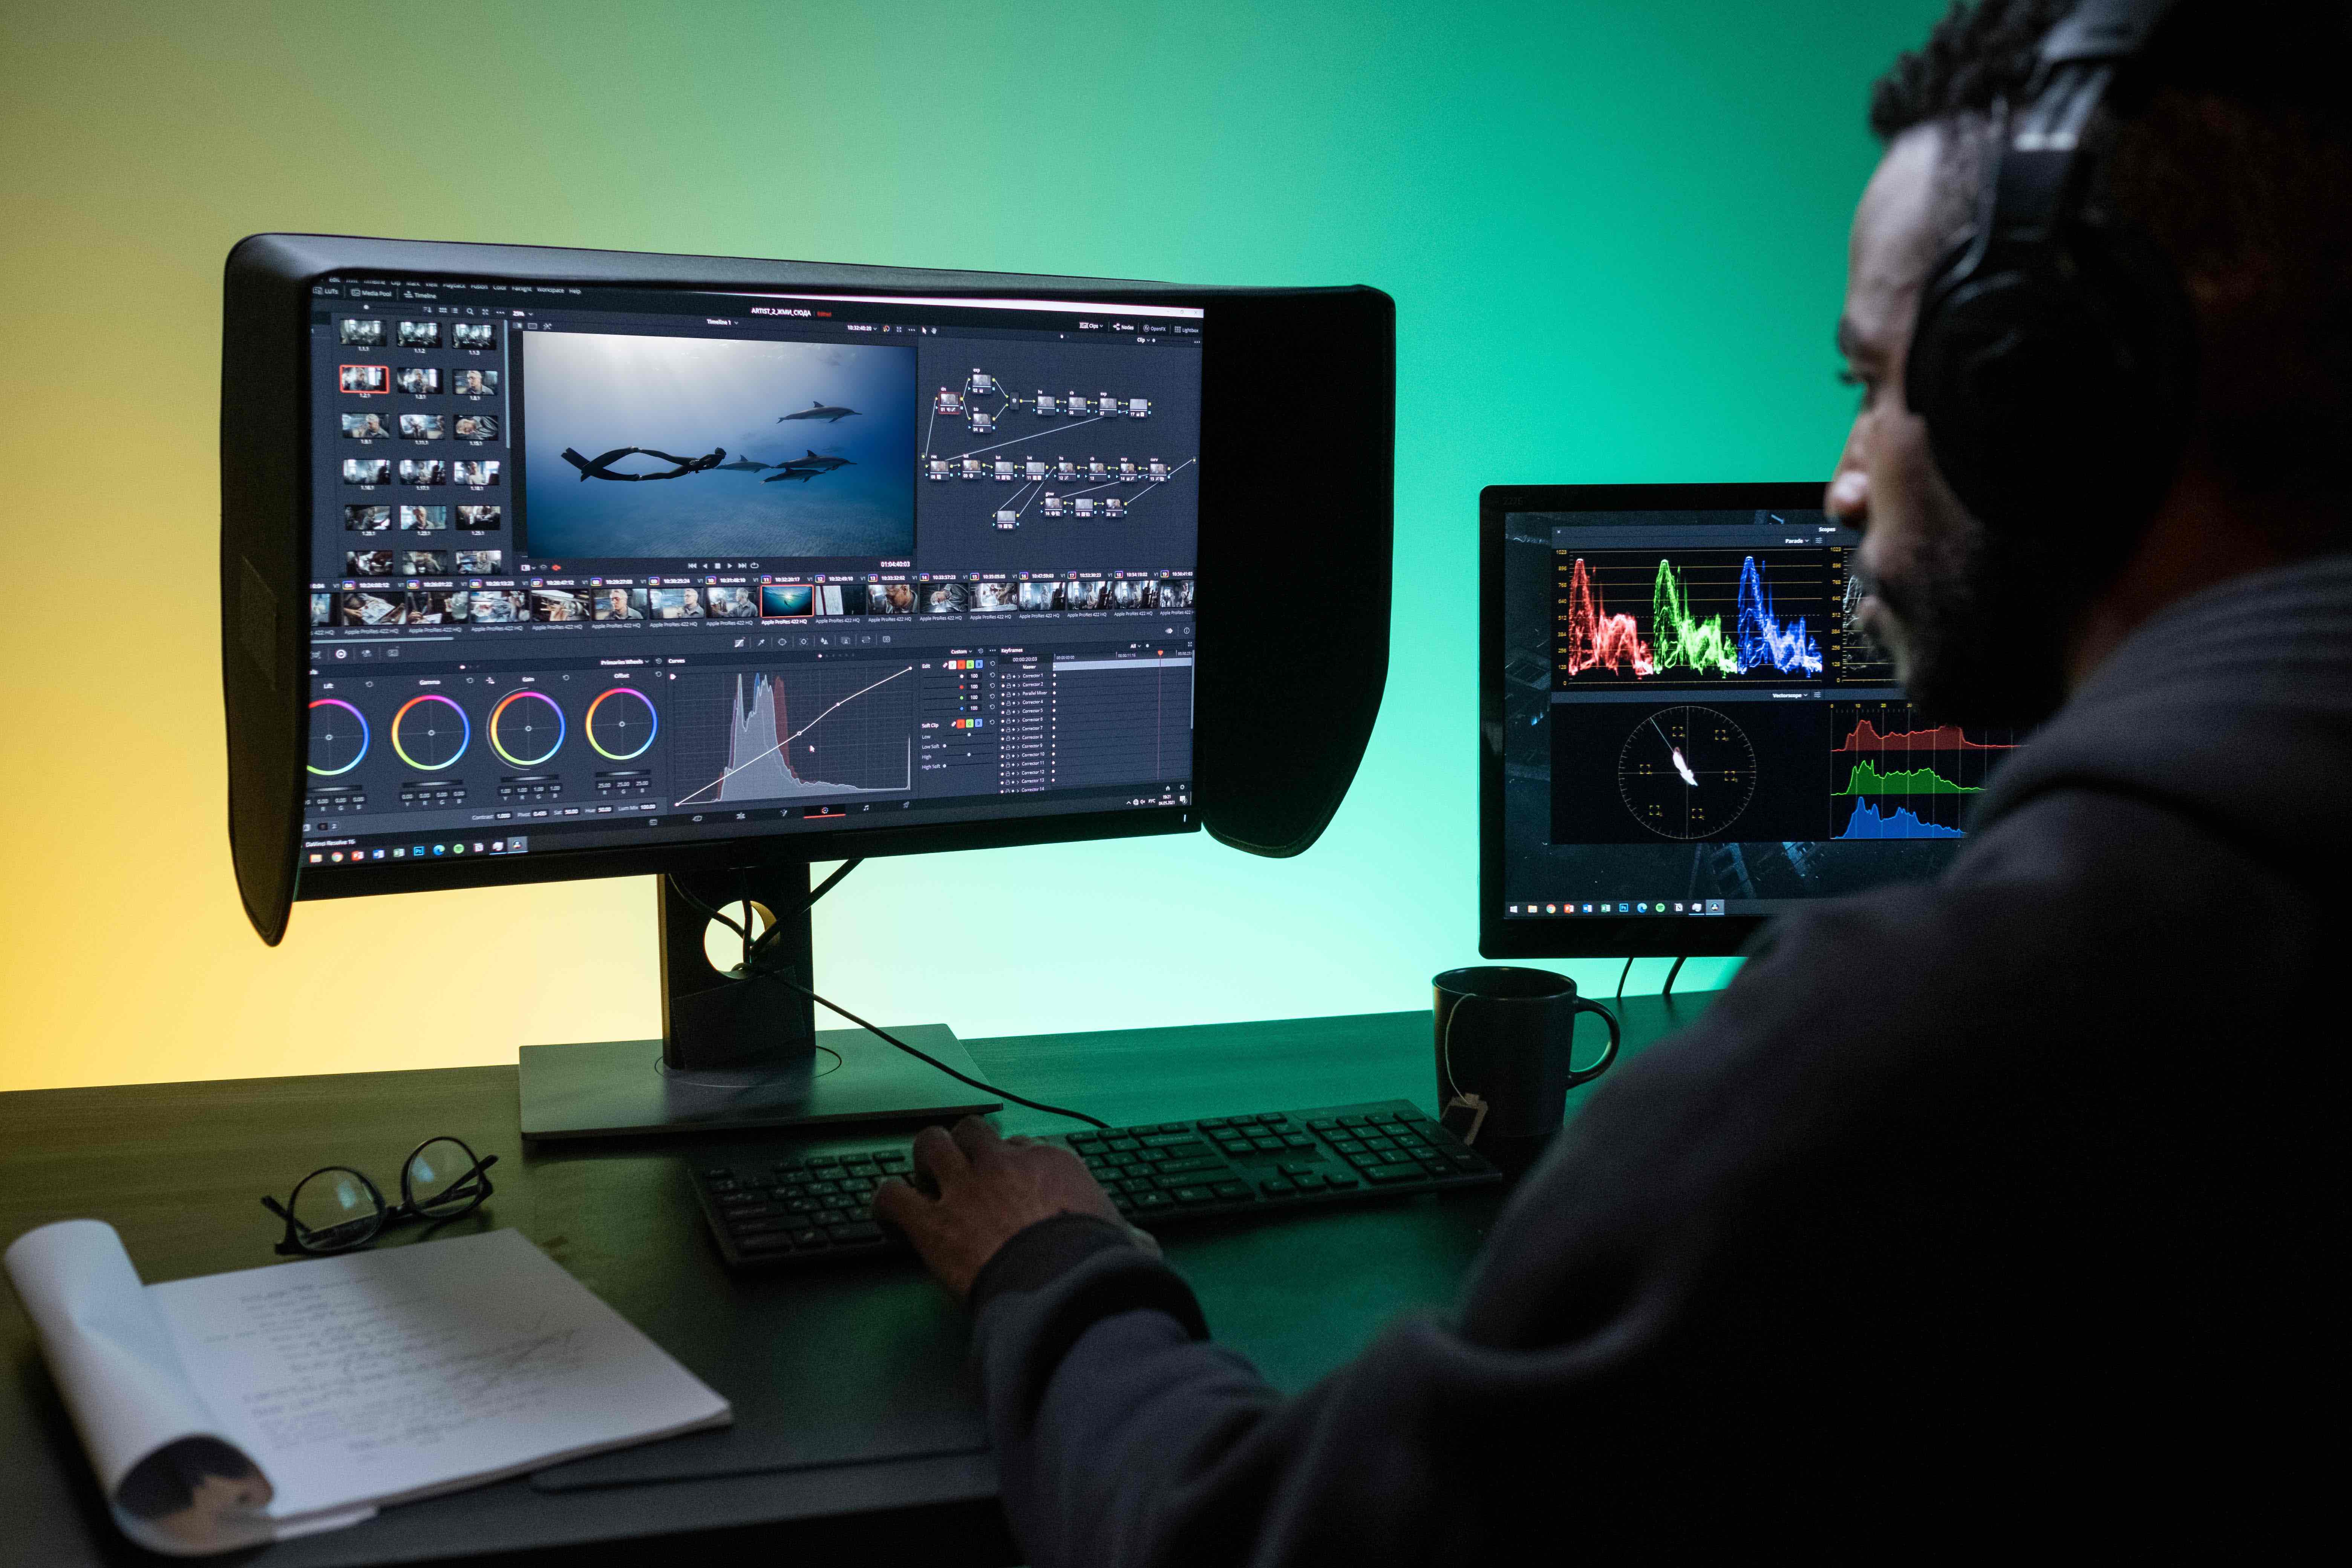
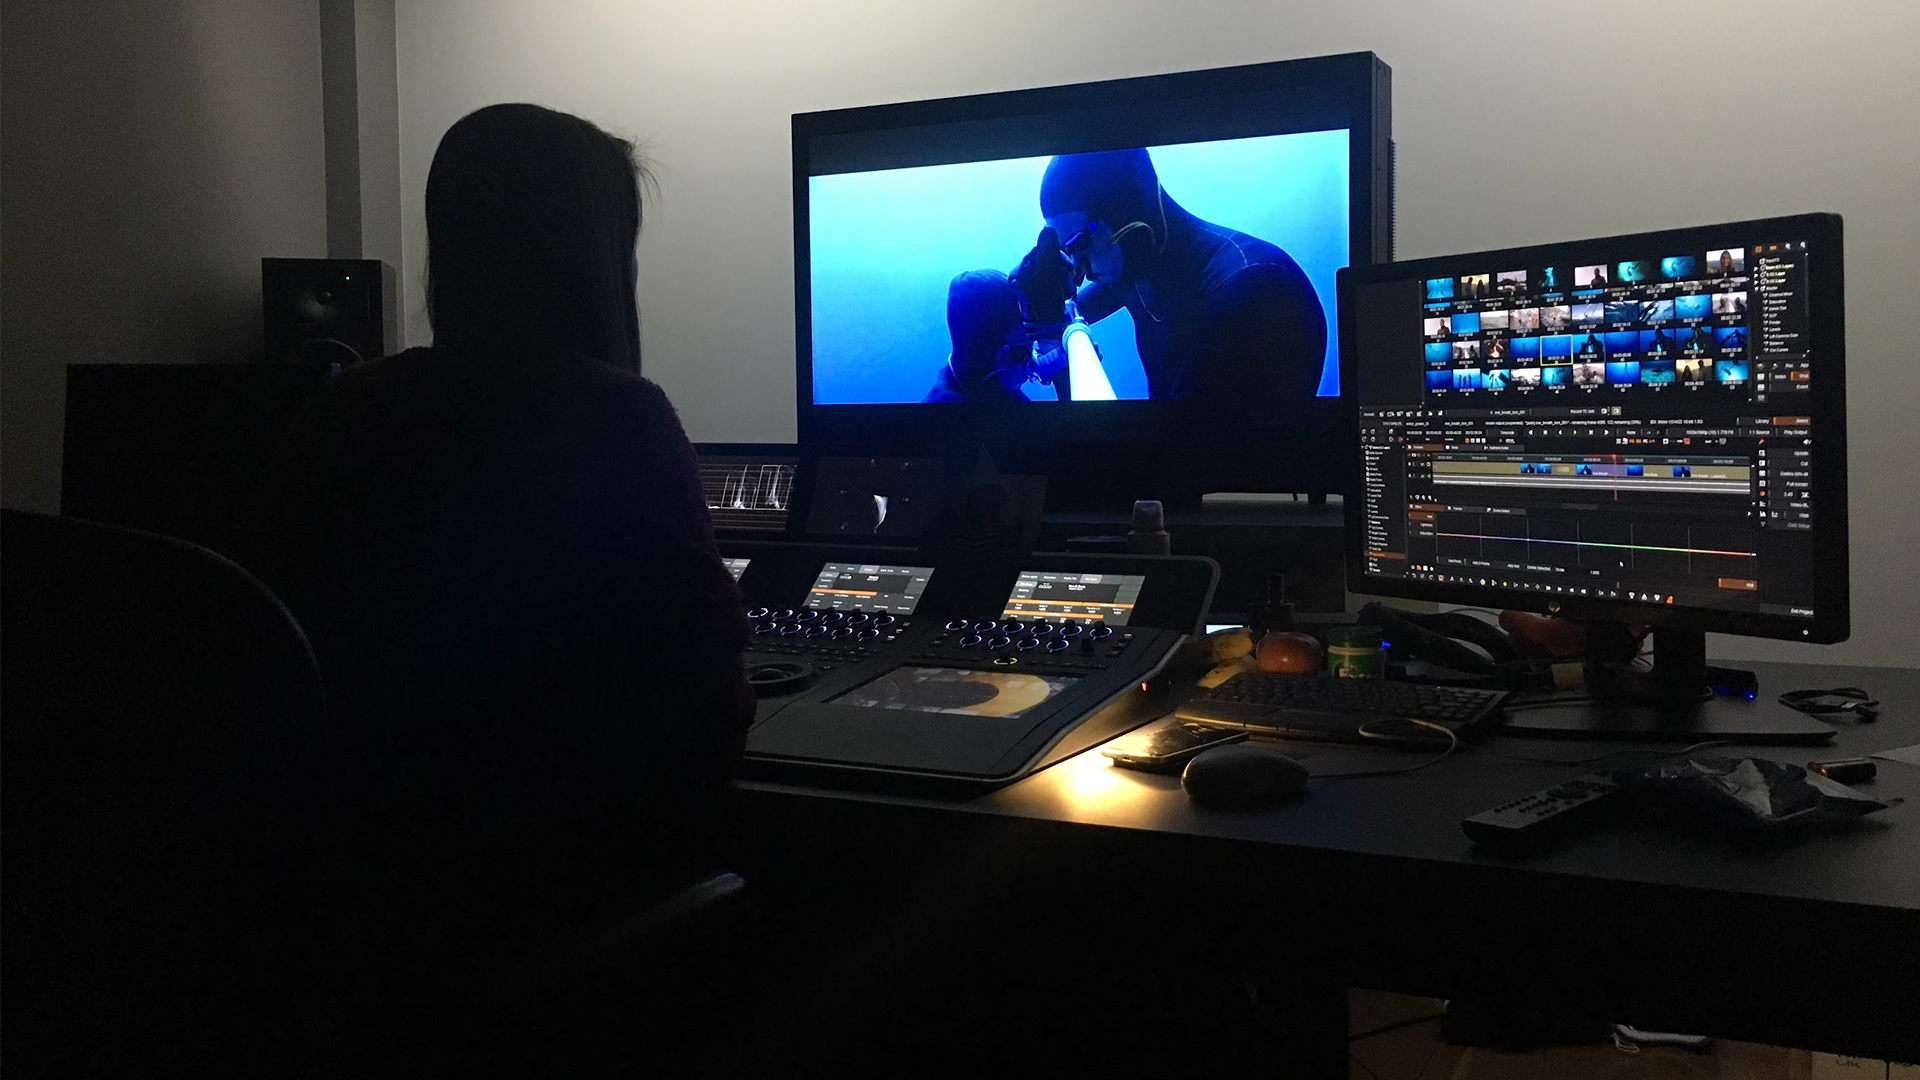
9. Colour Grading
This is where you adjust the colours in your footage to make it feel more vibrant and sharp, and create an overall mood and tone that's consistent throughout your film. Colour grading can completely change how a scene feels. It's one of the final steps, but it makes a big visual difference.
10. Final Delivery
This is where you get the film ready to be seen by the world. That means exporting in the right format for your distribution platform, whether that's a film festival, a broadcaster, YouTube, or a streaming service.
How Long Does It Take to Edit a Documentary?
This is one of the most common questions I get asked. The honest answer: it depends. A 10-minute short documentary might take 2 to 4 weeks to edit. A 90-minute feature documentary can take anywhere from 3 to 12 months, sometimes longer.
The biggest factors are the amount of footage you shot (the shooting ratio), how organised that footage is, and how clear your story structure is before you start cutting. A 50:1 shooting ratio, which is common in documentary, means 50 hours of footage for every 1 hour of finished film. That's a lot of material to review, log, and shape.
From my experience, the editing stage that takes the longest is getting from the assembly edit to a solid rough cut. That's where you're making the hardest creative decisions about story, structure, and pacing. The good news is that each stage after that moves faster.
Common Documentary Editing Mistakes
After 15 years of editing and reviewing student films, these are the mistakes I see most often:
Skipping the organisation step. Jumping straight into the timeline without logging and organising your footage first. This always costs more time than it saves.
Falling in love with footage. Just because a shot is beautiful or an interview moment is interesting doesn't mean it belongs in the final film. If it doesn't serve the story, cut it.
Finessing too early. Spending hours perfecting a sequence during the assembly edit when you're likely to restructure it later. Get the shape right first, then polish.
Not getting outside feedback. After weeks in the edit, you lose perspective. Show your rough cut to people who haven't seen the footage. Their fresh eyes will catch things you can't.
Ignoring sound design. Many first-time editors treat sound as an afterthought. Great sound design can carry a scene that's visually weak, and poor sound can ruin an otherwise strong sequence.
Documentary Editing FAQ
What is the 3:2:1 rule in video editing?
The 3:2:1 rule is actually a backup strategy, not an editing technique. It means keeping 3 copies of your files, on 2 different types of storage media, with 1 copy stored off-site. For documentary editors working with irreplaceable footage, this is essential. If a hard drive fails and you haven't backed up, you could lose months of work.
What editing software do documentaries use?
The most common documentary editing software is Adobe Premiere Pro, Avid Media Composer, Final Cut Pro, and DaVinci Resolve. Premiere Pro and Avid are industry standards for professional projects. DaVinci Resolve is popular because its free version is very capable. The best choice depends on your budget, your computer, and your personal preference.
How long does it take to edit a 20-minute documentary?
A 20-minute documentary typically takes 3 to 8 weeks to edit, depending on the complexity of your story and how much footage you shot. If your footage is well-organised and you have a clear paper edit, you can move faster. If you're working with a high shooting ratio and an unclear story structure, expect it to take longer.
Do I need expensive software to edit a documentary?
No. DaVinci Resolve offers a free version with professional-grade editing and colour grading tools. iMovie is also free on Mac. You can edit a high-quality documentary without spending anything on software. The editing skills matter more than the tool.
What is a paper edit in documentary filmmaking?
A paper edit is a written plan for how you'll structure your documentary before you start cutting. You map out the order of scenes, interview bites, and B-roll on paper (or in software like Trint). It gives you a roadmap so you're not aimlessly moving clips around on the timeline.
Start Editing Your Documentary
So that's a rundown of my editing workflow. My hope is to help take some of the mystery out of the documentary editing process, which can feel overwhelming when you're starting out. If you ever get stuck, just break the work into smaller chunks until it feels more manageable, and go from there.
If you want to go deeper into every part of this process, our Documentary Fundamentals course walks you through each editing stage with hands-on exercises to help you finish your film.